
I thought you would be interested in making beanies by yourselves. So, as a first project of my crochet tutorial, I’ve picked up Hello Kitty beanie which I’ve already uploaded in the previous blog. If you like it, please feel free to make one by yourself 🙂 I will also be happy to see your works once they are done!! Then, let’s get started 🙂

◆Materials◆
Worsted Weight Yarn (Medium 4)
- White: CARON SIMPLY SOFT (WHITE)
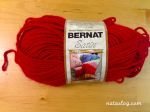
- Red: BERNAT Satin (CRIMSON)
- Black: CARON SIMPLY SOFT (BLACK)
- Yellow: Sugar’n Cream (YELLOW)


Size G(4mm) Crochet Hook
Size H(5mm) Crochet Hook
Yarn Needle
◆Size◆
If you follow the instruction below, it will probably fit for 1 year old baby. But everyone uses a different tense when we crochet, so the outcome might be in a different size. If you want something bigger, you can just add an increase row and some even rows. I strongly recommend to check before stepping forward to the even rows (in this instruction, it’s at the end of Row7) if it fits the head size. You can always adjust the size as you like 🙂
◆Pattern◆
*** It’s easier to start every row with 2 chains and end each row with a slip stitch since you will see where you started the row which you are working on. If you take this method, please don’t forget to count this 2 chains as 1 hdc. (So, you need to skip 1 “hdc” in the instruction below, starting from Row 2.)
*** I like the seamless surface, so in this tutorial, I take this method. You just have to keep going, but it may be difficult to see where you started the row. So, it’s better to use a safety pin at the first stitch of each row.
◇◆◇◆◇◆◇◆◇◆
◇Step 1: Face with Size H hook, White yarn◇

- Row 1 : Make a double magic ring (magic loop). Ch 2, and 7 hdc in the magic ring. (8 hdc*)
- An easy tutorial on magic ring is introduced here: “How to make double magic ring”
- You will count Ch 2 at the beginning of the row as 1 stitch
- Row 2 : 2 hdc in each stitch around (16 hdc)
- Row 3 : 2 hdc in the 1st stitch, hdc in the next stitch around (24 hdc)
- Row 4 : 2 hdc in the 1st stitch, hdc in the next 2 stitch around (32 hdc)
- Row 5 : 2 hdc in the 1st stitch, hdc in the next 3 stitch around (40 hdc)
- Row 6 : 2 hdc in the 1st stitch, hdc in the next 4 stitch around (48 hdc)
- Row 7 : 2 hdc in the 1st stitch, hdc in the next 5 stitch around (56 hdc)
- You may adjust the size here.
- Row 8-16 : hdc in each stitch (56 hdc)
◇Step 2: Ears with Size H hook, White yarn◇

- Row 1 : Make a double magic ring (magic loop). Ch 2, and 5 hdc in the magic ring. (6 hdc*)
- An easy tutorial on magic ring is introduced here: “How to make double magic ring”
- You will count Ch 2 at the beginning of the row as 1 stitch
- Row 2 : 2 hdc in the 1st stitch, hdc in the next stitch around (9 hdc)
- Row 3 : 2 hdc in the 1st stitch, hdc in the next 2 stitch around (12 hdc)
- Row 4 : 2 hdc in the 1st stitch, hdc in the next 3 stitch around (15 hdc)
- Row 5 : 2 hdc in the 1st stitch, hdc in the next 4 stitch around (18 hdc)
- Row 6 : 2 hdc in the 1st stitch, hdc in the next 5 stitch around (21 hdc)
- Cut the yarn long (around 10″) for sewing purpose.
- You will make two of these ears and sew on the face with the yarn you left.
◇Step 3: Eyes with Size G hook, Black yarn◇

- Row 1 : Chain 4
- Row 2 : Sc in the 2nd stitch from the hook. 1sc, 3sc, then 1sc in the following 2 stitch. Finish with slip stitch at the 1st stitch of the row.
- Cut the yarn long (around 5″) for sewing purpose.
- You will make two of these eyes and sew on the face vertically.
◇Step 4: Nose with Size G hook, Yellow yarn◇

- Row 1 : Chain 4
- Row 2 : Sc in the 2nd stitch from the hook. 1sc, 3sc, then 1sc in the following 2 stitch. Finish with slip stitch at the 1st stitch of the row.
- Cut the yarn long (around 5″) for sewing purpose.
- You will sew the nose on the face horizontally.
◇Step 5: Whiskers with Yarn Needle, Black yarn◇

- Embroider whiskers with a yarn needle just as you like. You can adjust the length and angles of them, which will make a difference of the expression of the Kitty.
◇Step 6: Bow with Size G hook, Red yarn◇
*I posted a tutorial on making a bow in the other article. I introduced very much in detail with step-by-step photos. So, please check the instruction.
Here is the title of the article: Here Summer Comes!! Ponytail With A Pretty Bow??
◇◇Make oblong & Center ring


◇◇Put together
Insert the oblong into the center ring and sew not to move around. Then, sew it onto the right side of the ear (from your view point).

◇◆◇◆◇◆◇◆◇◆
♡♡♡ Thank you so much if you follow the instruction all the way till here. ♡♡♡
Now it’s done!!! I hope you liked how I made Hello Kitty!!
If you find some difficulties to understand some parts, please just leave a comment!! Enjoy making “lovely handmade things” by yourself 🙂

Thank you for the good tutorial for Hello Kitty Beanie. It was easy to follow your instructions.
LikeLike
Hi Lynxx, thank you so much for your comments 😀 I’m really happy to hear from you !! I’ll be glad if I can see your works ♡
LikeLike
I don’t understand the instructions for the hello kitty eyes and nose. instructions are confusing, chain 4, sc in second chain from hook then what? please help
LikeLike
Please think the first 3 chains as a foundation chain. After making 1 sc in the second chain from hook, you’ll make 1 sc in the next st. Then, make 3 sc in the following st, which is the end of the foundation chain. Then, you’ll keep working and make 1 sc in the next two sts, which is the backside of the foundation chain. Hope you get it with this instruction now.
LikeLike